What started out as an idea folder stuffed in a drawer… soon became idea folders organized into a small file box… and eventually that became a 3-ring binder filled with home design and decorating ideas.
Today, my old 3-ring binder that was filled to the brim with modern house design & decorating ideas has morphed into Version 4.0 of my Dream Home Idea Notebook!
After gathering many year’s worth of dream home ideas, it was obvious that I had outgrown that original 3-ring binder!
It was time to reorganize…
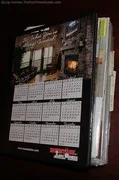
Dream House Idea Notebook Version 4.0
A year into the process of building our log home (up to the point where we cleared the land and fine-tuned the blueprints), I realized that in order for all of these ideas I’d been collecting to truly be meaningful and valuable in the process of building our log home, I was going to need to revamp my system.
Actually, it was easy!
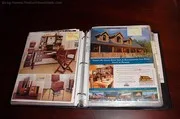
All I had to do was separate all of my DESIGN ideas (separated by room) and all of my DECORATING ideas (also separated by room) — into two notebooks this time!
This way, I can tote along with me all of the design ideas that are definitely going to influence our final set of blueprints — because that’s still where we are in the home building process right now. And, it will also be easy to refer to those design ideas whenever we are making our final decisions and ordering our cabinets, countertops, flooring, etc.
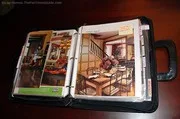
Now, if I’m asked along the way about any of the little details that will be going into the ultimate design of each room of our new house, I’ll know exactly where to look. And I can whip out an example of something I like right away!
Before, with all of the “decorating” ideas mixed in with the “design” ideas, it just took too much time to sort through them all on-the-spot.
Version 4.0 of the Idea Notebook has definitely made the process of designing and decorating our log home even easier:
- One notebook just for DESIGN ideas that have to be determined early in the process… structural details that a contractor would need to know.
- And one notebook just for all of the DECORATING ideas that can still be fine-tuned along the way… up until the final moment that we purchase each item.
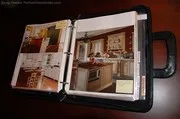
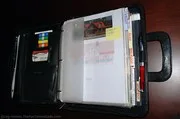

Our dream house layout ideas and dream home design plans are what we’re looking at most frequently right now, so they’re kept in the black leather portfolio with handles — for easy carrying to meetings and stuff.
The dream home decorating ideas and any decisions that will be made after the house is built are kept in a basic black 3-ring binder (an extra-thick one… with 3-inch rings).
For What It’s Worth…
I was able to repurpose an old “briefcase” type 3-ring binder that I used to use for work. It’s perfect because it’s got handles! And there are pockets and dividers everywhere — including both the inside and outside covers.
Plus, it’s leather. So it’s very durable. And, it looks professional too. I don’t feel uncomfortable carrying this notebook into say, a Home Depot, a cabinet shop, or a flooring design center.
While a leather portfolio notebook is definitely not required (another plastic 3-ring notebook would have worked just as well), it’s highly recommended — in the event that you, too, have a spare one lying around or you find one really cheap on sale somewhere!