After we built our traditional brick home in Franklin Tennessee, we had to decorate it.
We knew we wanted some color, and we knew we wanted to step outside of our comfort level a bit.
So we did!
The following photos highlight the steps we went through to paint and decorate our new home…
Where Do We Begin?

Before we even moved in, we painted all of the rooms in the house (including ceilings). We started with a blank canvas — all white walls and no accent pieces. Boy, were these rooms crying out for COLOR! Plus, our life had been a “sea of beige” everywhere we lived in the past, so the thought of bringing some color into our world seemed refreshing. Besides, the eye can see over 7 million colors… why in the world would anyone paint with only 1??? The first room we painted was the living room, then the adjoining hallways.
Love At First Swatch
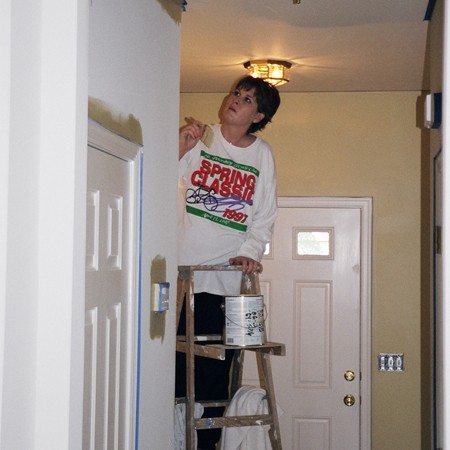
Our living room color was chosen after looking at one of the painted walls in a local furniture store. I took pictures of it, then went immediately to the paint section at Home Depot. I took a handful of color swatches that I thought resembled that particular and went back to the furniture store to see which color was the closest match. After that, it was a cinch to find colors for the other rooms in the house that “went” with the living room color (which is a camel/mustard color — more gold than brown). I concentrated on all of the detailed trim work, while Jim used the roller to paint the walls and ceilings.
Green With Envy

The second room we painted was the Dining Room. We use shades of sage green. Here’s what they say about the color green:
- It balances and heals; represents harmony
- Easy on the eyes… and soothing too
- It’s the color of spring, renewal, and fresh growth
- By reflecting nature, it gives life to a room
- It’s a fairly neutral color; goes nicely with most colors
- You should try to have something green in every space, even if it’s only a potted plant or a bunch of ivy leaves
Applying The Faux Treatment
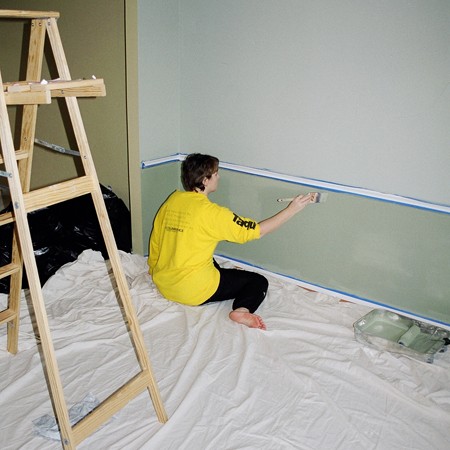
We decided we wanted to do a faux treatment on the walls in the Dining Room — partially to make up for its small size. And it worked! It’s the room that looks the most like it could’ve been “professionally” done. We chose to use the “ragging off” paint technique where you first brush on a solid color of one shade, then after it’s dry, you brush on another coat of paint in a slightly darker shade of the same color (and mixed with special chemicals). Finally, use cotton rags to dab blotches of your top coat OFF while it’s still wet. In the end, the lighter base pops through all the places where the rag didn’t touch the wall. Very cool!
Heads Up!
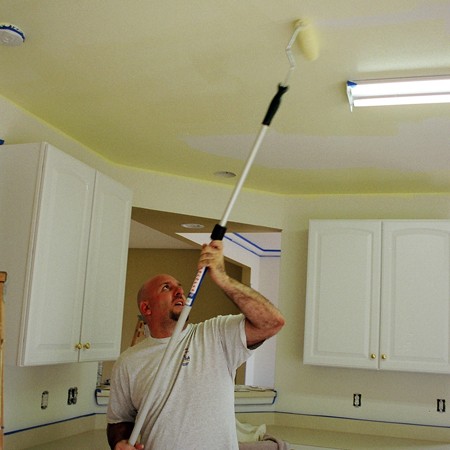
We took decorating to new heights by treating the ceiling as the 5th wall in each room (as most professional decorators encourage you to do). Fact: if you don’t want your ceiling to look gray, then don’t leave it white! Ceilings are always in shadows, so you should tint your ceiling with a paint color that’s 25% lighter than the very color you use on the walls in that room. It is said that color on the walls while leaving the ceiling white will make it look like you’ve spread a big bedsheet over it. If left white, your ceiling will seem lower than it is, and can hinder a room’s intended design. To make a ceiling seem even higher, you can illuminate the room with torches and sconces.
The Power Of Paint

They say that paint spreads MORE style for LESS money than any other decorating basic. (We spent $500 on Benjamin Moore paints for our entire 1,800 square food house.) Truth is, I was a bit more daring than Jim on the color choices. I’ve always enjoyed decorating, so I thought this would be my chance to test my skills to the fullest. (If you can’t feel comfortable expressing yourself in the privacy of your own home, then where else can you???) I even considered a bright primary orange (bold tangerine) for the kitchen or dining room… until Jim swore he’d have her committed! HINT: Men are usually afraid of anything they haven’t seen before, so avoid some arguments by showing him pictures of the effect you want. In fact, the #1 fear in home design is choosing color. And Jim was terrified! (He kept saying he was afraid his house would resemble what that Salma Hayek did to Matthew Perry in the movie Fools Rush In.)
Moving Day… Finally

After we painted all of the rooms inside of our newly built home in Franklin Tennessee, we were set to move in. In the morning, we loaded up our belongings from the house we were renting in Nashville. Then we spent several hours cleaning the rental home in hopes of receiving our full deposit back upon move-out. By late afternoon, we had arrived at our new home in Franklin, and spent several more hours — just the 2 of us — unloading everything! The washer & dryer… the king-size bed… dressers… and tons of STUFF. This was the first night we slept in our new home… on the floor.
Are We Home?

Jersey has moved 6 times in his 14 years with me — each time was a breeze. Sometimes, it was just between houses in the same town, but he handled cross-country moves just the same. He’s highly adaptable. Here, Jersey is hanging out at the garage door that opens into the kitchen. It was the one spot that he could keep an eye on us loading and unloading our things from the U-Haul truck… making sure we weren’t gonna leave him in this strange, new place.
We Sure Have A Lot Of “Stuff”!
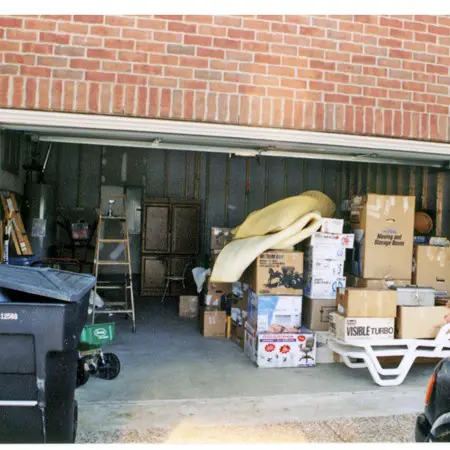
The garage was our “holding tank” for everything until it found its proper place inside the house. I’m such a fanatic for details and I always have a place for everything in my mind, so it didn’t take more than a couple days before the garage was cleared entirely! And, if you think this is a lot of “stuff”, you should’ve seen the years of accumulation I had stored in every crack & crevice of my Orlando apartment before I met Jim. Since then, I’ve done wonders at purging my life of all the unnecessary “stuff”. Most of it gets donated to Goodwill or sold in yard sales. In fact, a few of the bigger items here actually remained in the garage a couple days until our community garage sale took place (below).
We Love Garage Sales

Our move to Franklin, TN was coincidentally timed such that our OLD neighborhood held its community garage sale on the day before we moved out of that house, and our NEW neighborhood held its community garage sale just days after we moved into this house! Would you believe that in Franklin (actually, Williamson County Tennessee) you have to pay $5 to the city for a Garage Sale Permit in order to have a yard sale on your property?!
Everything’s Gotta Go!

We actually made out like a bandit at both of our garage sales — one at the old house before we moved and this one, just days after we moved. We did sell some pretty big items (like a sleeper sofa with matching loveseat & chair, craftsman toolbox, glass-top table with chairs, and a computer desk/armoire), but we ended up with $150 from the first sale, and $450 from the second one! Whatever didn’t sell went to Goodwill.
The Finished Product
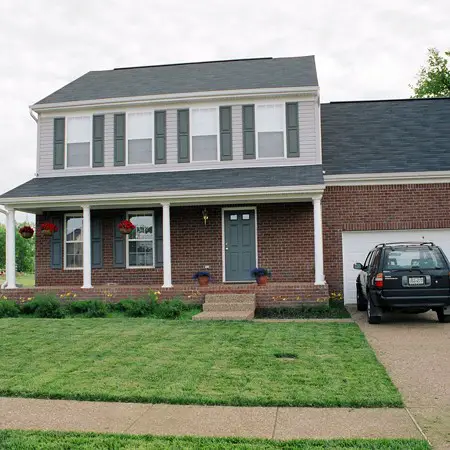
Here’s the final product… the finished version of our new house — after we lived in it for a few months, and decorated it inside and out.
Kitchen To Dining Room
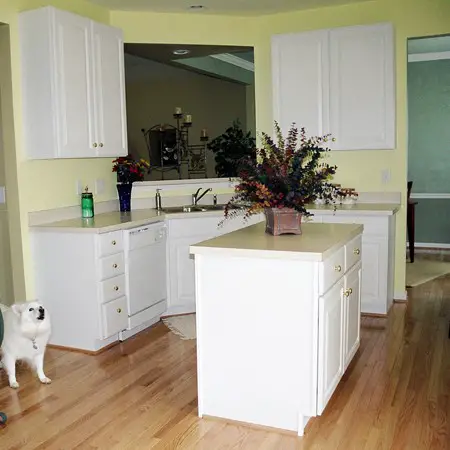
Here’s a view of the kitchen, after we painted it a light, sunshine yellow. As we were painting the room, the color dried more like a light neon green! We were terrified… thought we might have to repaint the entire room over again. But someone had told us to start filing the room with “stuff”, and once it started to look lived in the color would lighten and become livable. It’s true… It no longer resembles any shade of green, and it’s the pale yellow of sunshine that we initially dreamed of. Just perfect. We love this color for a kitchen.
“Every room needs a touch of yellow.”
— Eleanor McMillen Brown
A Room With A View
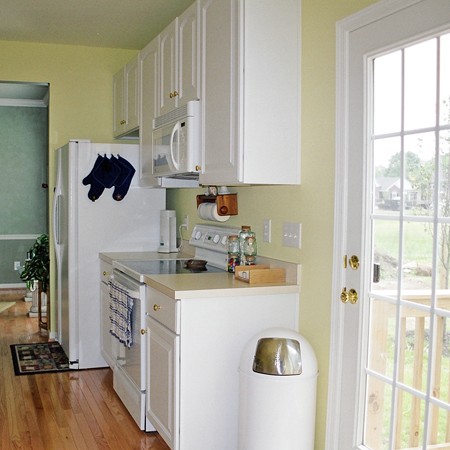
Here’s a view of our light yellow colored kitchen, looking toward the back door. This room and the adjoining dining room provide the most light downstairs, thanks to the double doors to the backyard and double windows in the dining room.
Yellow… It Does A Kitchen Good
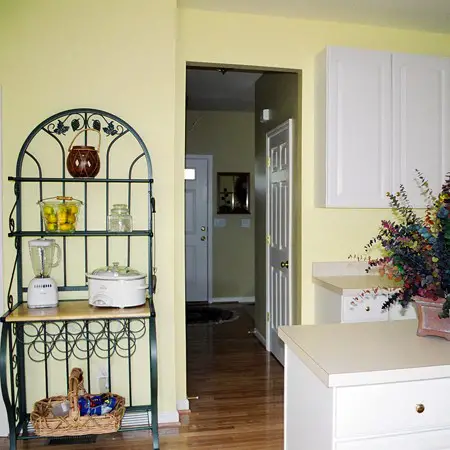
Here’s a view from our kitchen looking toward the front door. As far as color choices for the kitchen, they say that Red stimulates the appetite and encourages conversation. Green implies natural foods and health. Bright yellow is associated with lemon freshness and cheerfulness, but may be a little too stimulating because it makes you want to eat quickly.
Wine ‘Em And Dine ‘Em
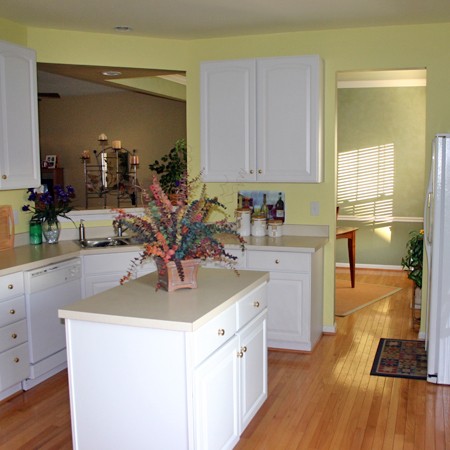
Fun facts about the color Yellow:
- It’s one of the most popular colors on the decorator’s palette. It’s also the most difficult to get right.
- Yellow’s springlike tones are particularly potent — they brighten your home — and you — like bringing sunshine into your home.
- You should put yellow paint on rooms that tend to catch the morning light.
- Light shining on yellow walls brings the sunshine indoors.
- Lemon yellow is a “youthful” shade.
- It’s a wonderfully warm and cheery color that adds zest to plain rooms. At the same time, it’s a simple, primary color.
- Cheerful and uncomplicated, yellow stirs happy emotions. The warmth, energy, and life-enhancing properties of the sun are embodied in yellow.
- Yellow symbolizes wisdom and stimulates the intellect.
- Yellow can become cold or muddy when used over a large area.
- It’s very responsive to lighting and faux paint effects; it likes texture.
- Yellow works especially well with green and blue.
- Makes a room glow on dull days or where there are few or no windows.
Plants And Flowers Everywhere
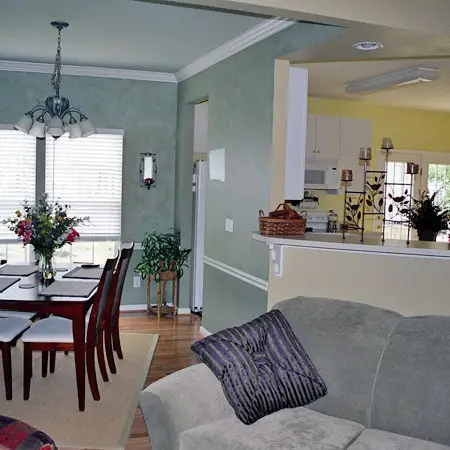
You can see how the faux treatment on the dining room walls turned out. Pretty good, we think. This picture also shows how both the living room and the kitchen are directly off the dining room. Notice the flowers on the dining room table? We get so many compliments on that particular arrangement. They’re fake. And they were expensive, but we got them at a bargain price from a store that was going out of business. Truth is, we bought them as a wedding gift for someone, but we liked them so much, we kept them for ourselves!
Our Living Room: Warm And Spicy
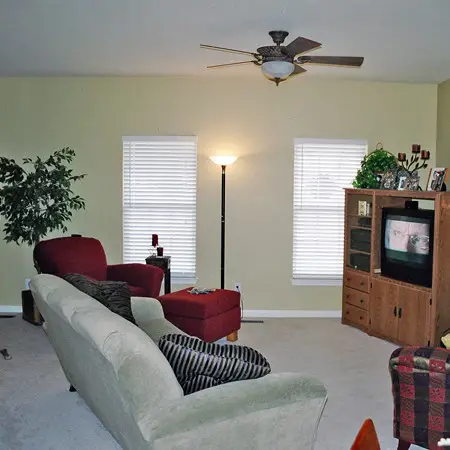
A view of the living room taken from the adjoining dining room. Our color scheme all started with this room. We determined the living room color first (by matching it with a color we’d seen in a decorator’s showroom) — it’s a camel/goldenrod kind of color. I read somewhere that the living room should be done in “warm colors” like reds, yellows, and oranges — in all shades and hues. Our entire downstars color scheme is done in earthy, bright neutrals (mustards & shades of yellow, with various shades of green including sage, and “pops” of oranges, purples, and reds). Overall, our colors resemble the colors of Fall — rustic, spicy hues.
Living Room & Dining Room

Our dining room is just off the kitchen. And the living room is just off the dining room. It’s so incredibly convenient! We just love having the most-used rooms in our house (when guests are here) so close to the kitchen.
But Everything’s Crooked!…
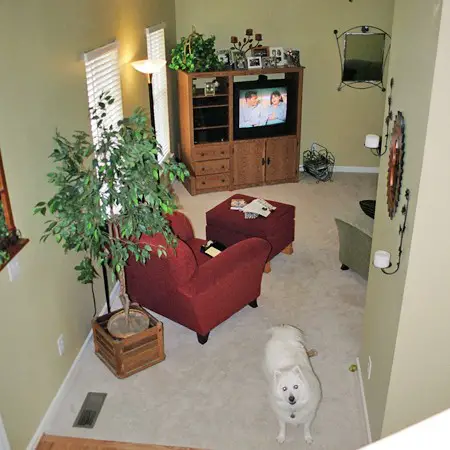
Two pieces of decorating advice I learned during my research:
- You should cluster upholstered furniture around an area rug to promote conversation.
- Nothing makes a chair or sofa look more inviting than a heap of plump cushions & pillows.
There never can be too many pillows. I incorporated another philosophy into our home decorating scheme: avoid parallels by placing everything on an angle! There’s hardly anything placed squarely (or “as it should be”) in our house. We’ve placed at angles everything from the dining room table to the living room sofa and all our chairs.
Stairway Going Upstairs
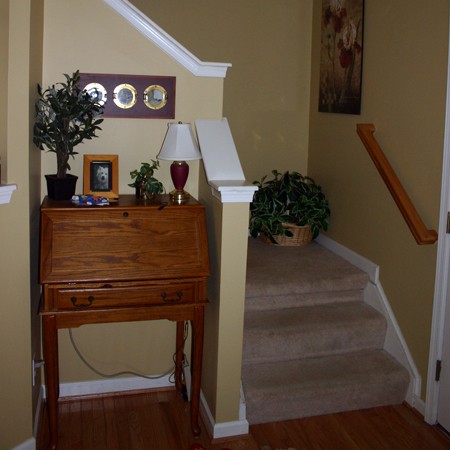
This is the little alcove in the foyer near the front door — just before you head upstairs. It’s a great little niche for this awesome hutch we found on clearance, and some other little decorative touches.
All White Bonus Room Prior To Painting
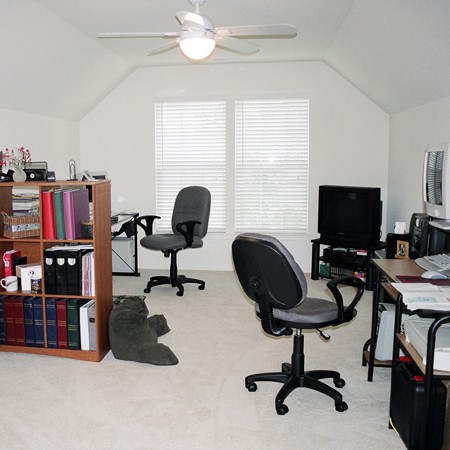
This is what the bonus room looked like before we painted it. Regardless of the color chosen, if there ever was evidence of the power of paint… check this one out!
Bonus Room… After A Coat Of Paint
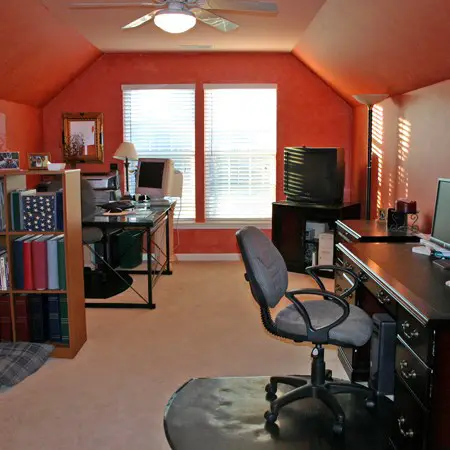
Now, doesn’t this same room look so much more “warm” and comfortable — as opposed to when the room was stark white? Okay, I’ll agree, it’s a tad too bright for many tastes, but it’s far better than white. I cannot for the life of me believe the amount of people who keep the rooms of their house white — or even off-white or beige for that matter. We’ve always wanted to repaint this room to tone it down just a bit, but never got around to it. After we moved out and started renting this home, the renters asked if they could paint it a warm tan. It looks very nice in that color too.
Our Office Is In The Bonus Room
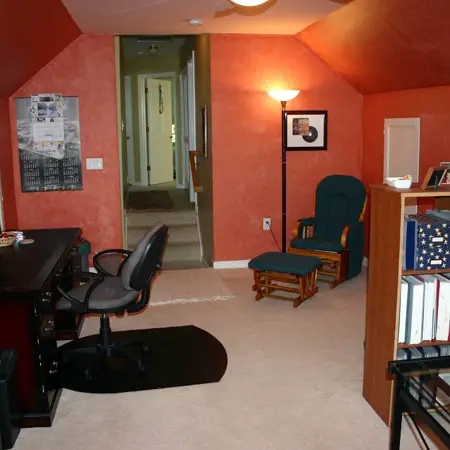
This room serves as our office. It’s the first room you come to after you walk upstairs. It’s all open, with a slanted ceiling, and megga storage space on either side. Since the bonus room is directly above the garage, there is more than enough storage on either side of this room — easily accessible from 2 separate doors. We had such good luck from our faux painting experience downstairs — with the dining room — that we decided to try our hand at it again. This time we picked a cinnamon orange color, though the “faux” is more obvious because the glaze color we chose for the treatment was much lighter in relation — thus the “rag marks” are quite obvious. Not a bad thing, just different than the dining room — which has much more subtle effects.
Jim’s Desk In The Office
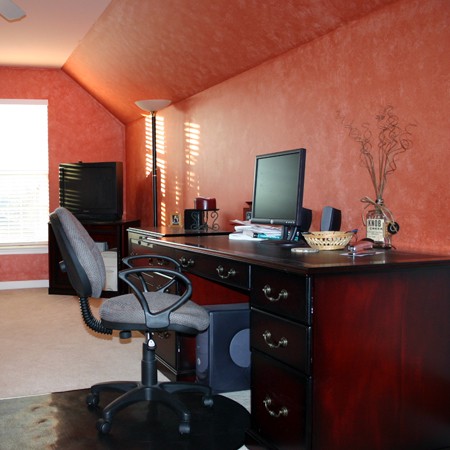
We’ve set the desks such that we each have our separate spaces to work. This is Jim’s side of the room. His desk is the first thing you come to when you walk into the room.
Lynnette’s Desk In The Bonus Room
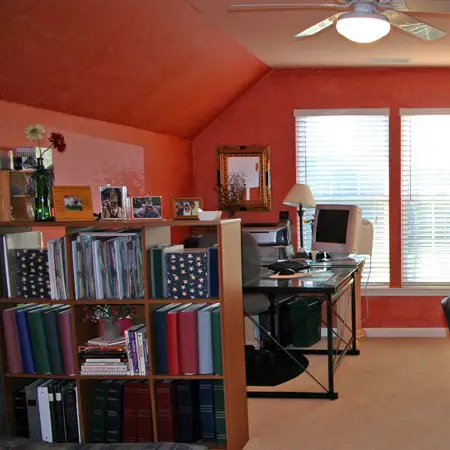
Lynnette’s work space is very organized. There’s a place for everything — and everything in its place! Notice the bookshelf that separates the room into “his” and “hers” work zones? That bookshelf holds all of Lynnette’s many years of scrapbooks, photo albums, and scrapbook supplies.
Master Bedroom

It’s hard to notice from this picture, but we’ve been married several years and we still don’t have a headboard or footboard for our bed! We just have a bed frame — and a very old one at that. Our bedroom looks more like a college dorm room than the master suite of a happily married couple. For the color, we chose a minty/sage kind of color. (It’s actually the “light” shade of green that we had leftover from our faux painting of the dining room.)
Master Bathroom Upstairs
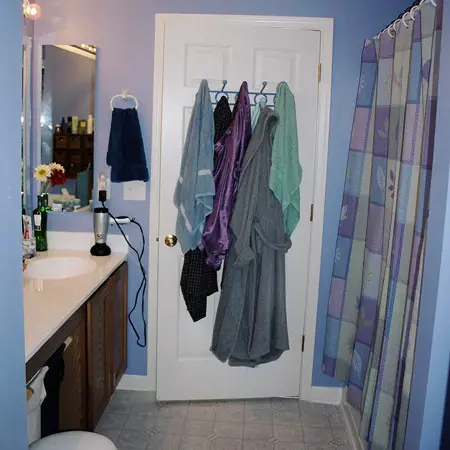
Our master bathroom is painted in a periwinkle color — it’s a really uplifting and cheery room. It also reminds me of the ocean. The blue that surrounds you in this room brings back memories of waves on the ocean and walking barefoot in the sand. The colors compliment the coloring of the adjoining bedroom quite nicely. In there, we have a mint/sage green and periwinkle/purple color for accents.
Fixing The Attic Door

We are so lucky to have a lot of storage space on either side of the bonus room upstairs. It’s over the garage, and each side has a walk-through door to the attic space. We also placed specially-made attic flooring (like plywood, purchased at Home Depot) along the entire floor space. Now we can store all of our stuff out of the way up there! Here, Jim and his dad are adding some fasteners to make it easier to open and close the door regularly, without the use of a door handle.
The Lawn Needs Mowed

Usually, Jim mowed the lawn and I did the edgework (using a weed wacker). Eventually, Jim started traveling more and I started doing the mowing. I didn’t mind though. It was a great little workout and a good way to get some fresh air and sun.
This house is, and will always be, near and dear to our heart. It’s the first home we built from the ground up… together. It’s also the first home that we put so much blood, sweat and tears into. It is our pride and joy.


